Ok, so you have already built several Power Automate workflows to support various business processes. And during your development, you also found the need for using conditions. You have even used several condition steps in the very beginning of your workflow to determine if you should continue the remaining processes of your workflow, or terminate it.
Did you know that, in about August, 2019, Microsoft released a new way of handling conditions in your trigger settings, that can let you skip your workflow process before the process is even started?
In this post I will give you some tips on how you can use these new trigger settings.
The “old” way
Let’s start with an old example. Just to explain how we used to do it.
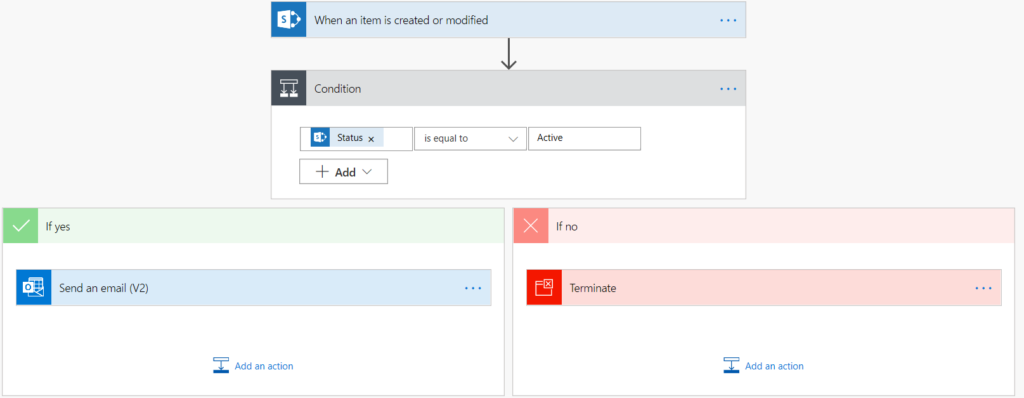
In the below example we have created a Power Automate flow with a standard trigger and set a condition which checks if a certain value is true. If the condition is met, the flow should continue to run it’s actions. If not, the flow should exit immediately (terminate). This process requires about 3 actions from the flow…
Using Trigger Conditions – The new way
With Trigger Conditions you now have a new option in your trigger settings which can be used to accomplish the same as the above, but in a more simple way. The difference is that the workflow will not figure as being executed in the flow history list unless the trigger condition is met (ok, yes it will, but it will be hidden – I will explain in the bottom of this post).
Another benefit, is that when a flow is “skipped”, it will not count on your user’s limited flow run quota.
This option is now available for most of the standard Triggers in Power Automate flows.
While having a new “Automated” flow created with a standard trigger (like the “When an item is created or modified”), you can now open the settings for the trigger and find the “Trigger Conditions” option…


In the below example I have configured the “Trigger Conditions” settings, so that the flow should only execute if an item’s “Status” field is set to “Active” in a SharePoint list…

The result, when executing the flow with the above settings, is that the flow will only execute if the above conditions are met (the value of the “Status” field is set to “Active”). In any other situations, the execution will be skipped.
How to find the value to insert into the trigger conditions
If you are having a hard time figuring out how to insert the values into your trigger conditions, the below trick can save you some pains.
- Add the workflow action “Get items” and configure it to lookup items in your list (in some cases you can ignore the “Get items” step). Then add a “Filter array” action and configure it as if it was your condition…

- When you are done, click on the “Filter array” action’s “Edit in advance mode” link, and there you have the result string to be used in your trigger condition…

- Simply copy the above result into your Trigger Condition settings and save the configuration.
How to find skipped workflows
While using Power Automate Flows with Trigger Conditions you will evidently have situations where the flow is triggered but also ignored (skipped), because your Trigger Conditions are not met. So where can you find these skipped Flows? The answer is in the “Flow Runs” – but you need to look at the right place…
- In your “Flow Runs” list view click on “All Runs”…

- From the “All runs” view click on the view settings and select “Checks (no new data)” option…

- You can now see the skipped flow runs.
Note! Although, you are able to see the flow’s skipped runs, you cannot see details about why the flow was skipped – this is definitely an area for improvement by Microsoft!
 By
By
1 thought on “Working with Power Automate trigger conditions”
Driss EL-FIGHA
A very important article